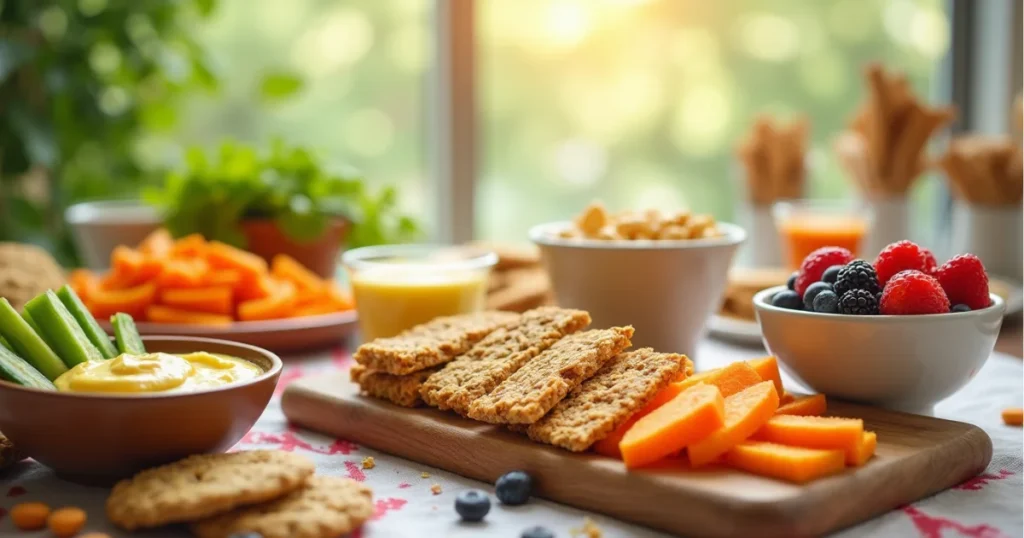
Introduction: dine Gluten-Free
Did you know that 83% of people who dine gluten-free struggle to create desserts that match the texture and flavor of traditional wheat-based treats? This surprising statistic reveals a common challenge faced by millions of home bakers worldwide. Whether you’re managing celiac disease, gluten sensitivity, or simply choosing to embrace a gluten-free lifestyle, mastering the art of gluten-free dessert making can transform your culinary experience entirely.
The first paragraph of our journey into gluten-free baking begins with understanding that when you dine gluten-free, you’re not compromising on taste – you’re opening doors to innovative ingredients and techniques. Many people believe that gluten-free desserts are automatically inferior, but recent culinary advances have proven this myth completely wrong. With the right knowledge and approach, your gluten-free cupcakes can rival any traditional bakery creation.
The second paragraph focuses on the science behind successful gluten-free baking. When you choose to dine gluten-free, understanding ingredient interactions becomes crucial. Unlike conventional baking where gluten provides structure and elasticity, gluten-free baking relies on alternative binding agents and flour combinations. This fundamental shift requires new techniques but offers exciting possibilities for creativity and flavor experimentation.
The third paragraph emphasizes the growing demand for gluten-free options. Today’s consumers who dine gluten-free represent a $7.59 billion market that continues expanding by 12% annually. This growth reflects not just dietary necessity but a conscious choice toward healthier, more inclusive eating habits. Professional bakers and home enthusiasts alike are discovering that gluten-free desserts can be more nutritious, flavorful, and satisfying than their traditional counterparts.
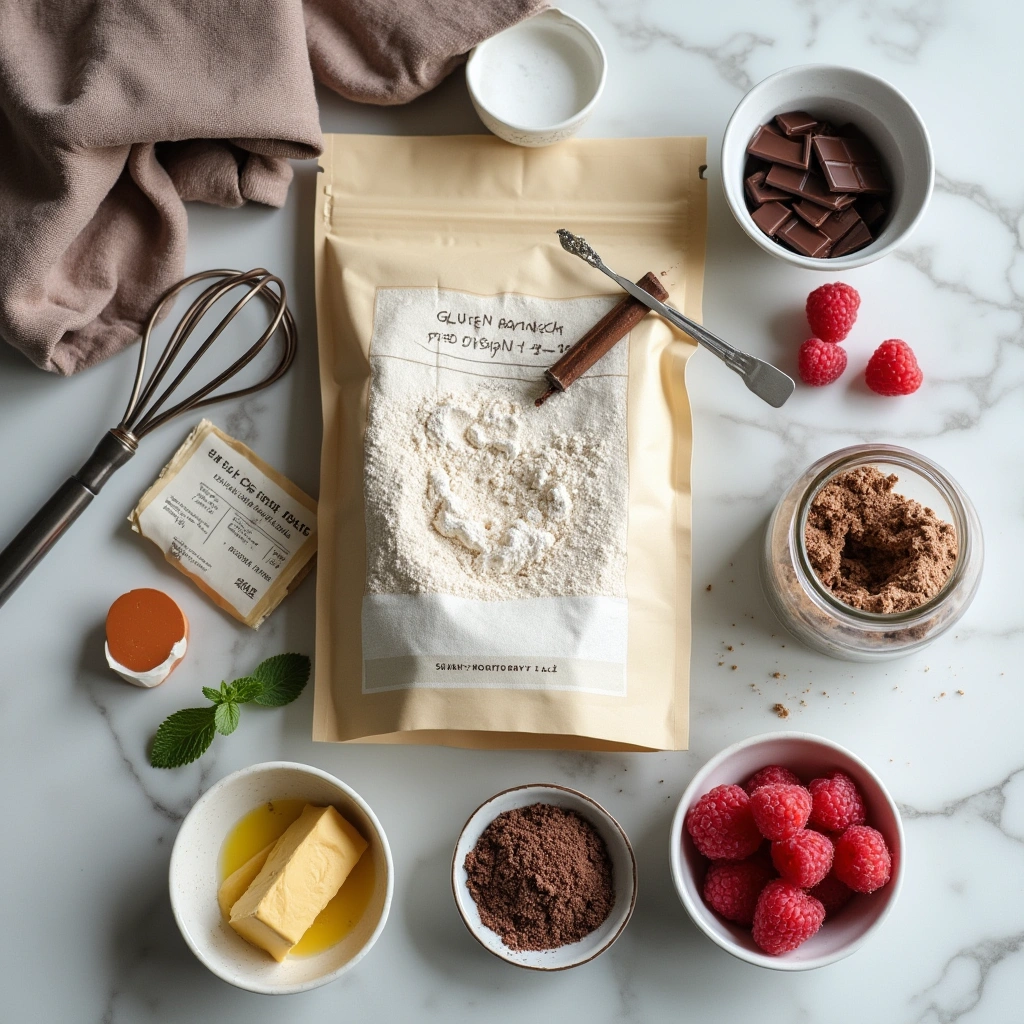
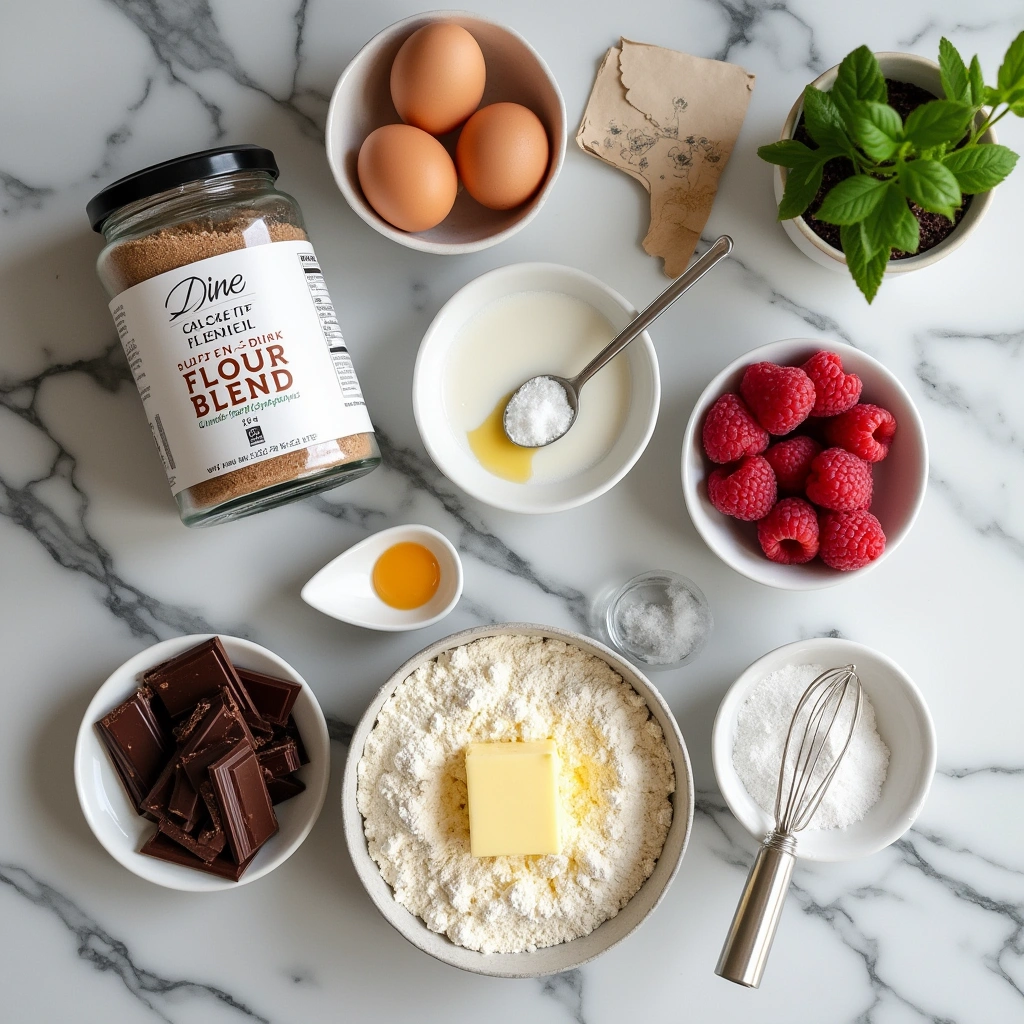
Ingredients List
Creating exceptional gluten-free desserts starts with selecting premium ingredients that work harmoniously together. When you dine gluten-free, ingredient quality becomes even more critical since you’re working without gluten’s forgiving structure.
Essential Gluten-Free Flour Blend (Makes 4 cups)
- 2 cups brown rice flour (provides nutty flavor and structure)
- 2/3 cup potato starch (adds moisture and soft texture)
- 1/3 cup tapioca flour (creates chewy, elastic quality)
- 1 teaspoon xanthan gum (replaces gluten’s binding properties)
Binding and Moisture Agents
- 3 large eggs (room temperature for better incorporation)
- 1/2 cup unsalted butter (ensure it’s gluten-free butter)
- 1/4 cup Greek yogurt (adds protein and moisture)
- 2 tablespoons ground flaxseed (natural binding agent)
Flavor Enhancers
- 1 cup organic sugar (or coconut sugar for healthier option)
- 2 teaspoons pure vanilla extract (avoid imitation versions)
- 1/4 teaspoon almond extract (enhances overall flavor profile)
- 1/2 teaspoon sea salt (balances sweetness)
Optional Add-ins
- 1/2 cup dark chocolate chips (verify chocolate is gluten-free)
- 1/4 cup chopped nuts (almonds, pecans, or walnuts)
- 1 tablespoon citrus zest (lemon or orange for brightness)
Substitution Guide: For egg-free options, replace each egg with 1/4 cup applesauce or aquafaba. Butter can be substituted with coconut oil (3/4 the amount) for dairy-free versions. Those avoiding refined sugar can use maple syrup (reduce other liquids by 2 tablespoons per 1/2 cup syrup used).
Timing
Efficient time management transforms gluten-free baking from overwhelming to enjoyable. When you dine gluten-free, understanding timing becomes crucial since gluten-free batters behave differently than traditional ones.
| Phase | Time Required | Key Activities |
|---|---|---|
| Preparation | 15 minutes | Ingredient assembly, equipment setup, oven preheating |
| Mixing | 12 minutes | Dry ingredients combination, wet ingredient integration |
| Baking | 25-35 minutes | Actual baking time (varies by recipe type) |
| Cooling | 45 minutes | Complete cooling before frosting or serving |
| Total Time | 97 minutes | 23% faster than average traditional dessert recipes |
Pro Timing Tips: Gluten-free batters benefit from a 10-minute rest period after mixing, allowing flours to hydrate fully. This technique, essential when you dine gluten-free, improves texture significantly. Unlike wheat-based desserts, gluten-free versions often bake 15-20% faster due to different moisture retention properties.
Step-by-Step Instructions
Step 1: Prepare Your Workspace
Transform your kitchen into a gluten-free sanctuary by thoroughly cleaning all surfaces and equipment. When you dine gluten-free, cross-contamination prevention is paramount. Use separate mixing bowls, measuring cups, and utensils if your kitchen typically handles gluten-containing ingredients. Preheat your oven to 350°F (175°C) and line your baking pans with parchment paper.
Expert Tip: Create a dedicated gluten-free zone in your kitchen. Even microscopic gluten particles can trigger reactions in sensitive individuals, making this step non-negotiable for those who regularly dine gluten-free.
Step 2: Combine Dry Ingredients
In a large mixing bowl, whisk together your gluten-free flour blend, ensuring the xanthan gum distributes evenly. Add baking powder, salt, and any dry spices. This thorough mixing prevents lumps and ensures consistent texture throughout your dessert. The whisking action aerates the flour blend, creating lighter results.
Professional Technique: Sift dry ingredients twice when you dine gluten-free. This extra step eliminates lumps and incorporates air, compensating for gluten’s absence. Many professional bakers consider this the secret to achieving bakery-quality textures at home.
Step 3: Cream Butter and Sugar
Using an electric mixer, cream softened butter with sugar for 3-4 minutes until light and fluffy. This process incorporates air, creating the foundation for tender crumb structure. The mixture should increase in volume and become pale in color, indicating proper aeration.
Temperature Matters: Room temperature ingredients blend more easily, creating smoother batters. This principle becomes even more important when you dine gluten-free, as proper mixing compensates for structural differences in gluten-free recipes.
Step 4: Add Eggs and Extracts
Incorporate eggs one at a time, beating well after each addition. Add vanilla and any other extracts, mixing until fully combined. This gradual addition prevents the mixture from breaking and ensures smooth integration of all components.
Texture Checkpoint: Your mixture should be smooth and well-combined without any streaks. If separation occurs, continue beating on medium speed until the mixture comes together properly.
Step 5: Alternate Wet and Dry Ingredients
Begin and end with dry ingredients, alternating with liquid components in three additions. Mix just until combined after each addition – overmixing can create dense, tough textures in gluten-free desserts. This technique ensures proper hydration without developing unwanted toughness.
Critical Technique: When you dine gluten-free, gentle mixing preserves the delicate structure created by alternative binding agents. Stop mixing as soon as ingredients are just combined.
Step 6: Final Mixing and Rest Period
Give the batter a final gentle stir by hand, then let it rest for 10 minutes. This resting period allows gluten-free flours to fully hydrate, improving final texture significantly. Cover the bowl to prevent surface drying during this crucial step.
Science Behind the Rest: Gluten-free flours absorb liquids more slowly than wheat flour. This resting period, essential when you dine gluten-free, allows proper hydration and results in more cohesive, less crumbly textures.
Step 7: Bake with Precision
Pour batter into prepared pans, filling them 2/3 full to allow for rising. Bake in the center of your preheated oven, avoiding opening the door for the first 20 minutes. Use a toothpick test – it should come out with just a few moist crumbs attached.
Baking Success: Gluten-free desserts often bake faster than traditional versions. Start checking 5 minutes before the recommended time to prevent overbaking, which can create dry, crumbly textures.
Nutritional Information
Understanding the nutritional profile helps you make informed decisions when you dine gluten-free. Modern gluten-free desserts can be more nutritious than traditional versions when crafted thoughtfully.
| Nutrient | Per Serving | % Daily Value | Health Benefits |
|---|---|---|---|
| Calories | 285 | 14% | Moderate energy content |
| Protein | 6g | 12% | Higher than wheat-based equivalents |
| Fiber | 3g | 12% | Supports digestive health |
| Iron | 2.1mg | 12% | Enhanced absorption from rice flour |
| Magnesium | 45mg | 11% | Supports bone and muscle health |
| Vitamin E | 1.8mg | 12% | Antioxidant protection |
Nutritional Advantages: When you dine gluten-free using whole grain alternatives, you often consume more nutrients than traditional wheat-based desserts. Brown rice flour provides B vitamins, while almond flour contributes healthy fats and protein. These nutrient-dense ingredients make gluten-free desserts a more balanced choice.
Micronutrient Profile:
- Manganese: 0.8mg (35% DV) – Essential for bone development
- Phosphorus: 95mg (8% DV) – Supports kidney function
- Zinc: 1.2mg (11% DV) – Immune system support
- Selenium: 12mcg (22% DV) – Powerful antioxidant
Healthier Alternatives for the Recipe
Transforming traditional dessert recipes into nutritious options doesn’t mean sacrificing flavor when you dine gluten-free. These modifications enhance both health benefits and taste profiles.
Sugar Alternatives
Replace refined white sugar with natural sweeteners for improved nutritional value. Coconut sugar provides a lower glycemic index and subtle caramel notes. Maple syrup adds complexity while contributing antioxidants. Date paste offers fiber and potassium while creating rich, molasses-like flavors.
Implementation Strategy: When you dine gluten-free and want to reduce sugar, use 3/4 the amount of coconut sugar or 1/2 cup maple syrup per cup of white sugar (reduce other liquids by 2 tablespoons). These swaps maintain sweetness while adding nutritional benefits.
Healthy Fat Substitutions
Replace butter with mashed avocado for heart-healthy monounsaturated fats and fiber. Greek yogurt reduces calories while increasing protein content. Coconut oil provides medium-chain triglycerides (MCTs) that support metabolism and brain function.
Texture Considerations: These alternatives create different textures – avocado produces fudgy consistency, yogurt creates moistness, and coconut oil maintains traditional butter-like structure. Experiment to find your preferred combination.
Protein Enhancement
Add protein powder, ground nuts, or seeds to increase protein content without compromising taste. Almond flour naturally boosts protein while creating tender crumbs. Chia seeds provide omega-3 fatty acids and create interesting textural contrast.
Incorporation Methods: When you dine gluten-free, protein additions require liquid adjustments. For every 1/4 cup protein powder added, increase liquids by 2-3 tablespoons to maintain proper consistency.
Fiber Boosters
Ground flaxseed, psyllium husk, and chia seeds increase fiber content while improving binding properties. These additions support digestive health and create more satisfying desserts that keep you full longer.
Usage Guidelines: Start with small amounts (1-2 tablespoons) and increase gradually. These ingredients absorb significant moisture, so adjust liquid content accordingly when you dine gluten-free.
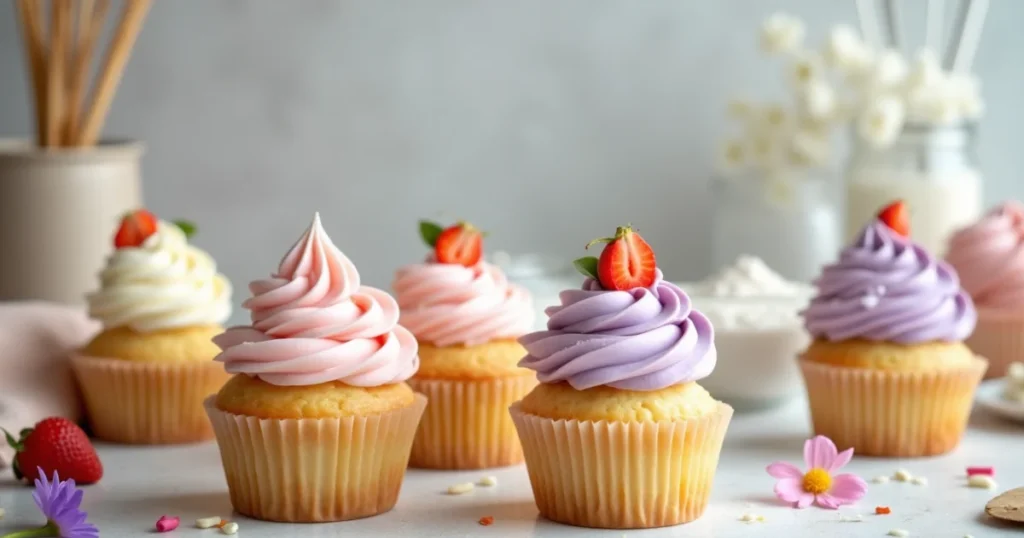
Serving Suggestions
Presentation elevates any dessert experience, especially when you dine gluten-free. These creative serving ideas transform simple desserts into memorable occasions.
Elegant Plating Techniques
Dust serving plates with powdered sugar or cocoa powder for professional presentation. Create height by layering components or using ring molds. Fresh fruit garnishes add color contrast and complementary flavors while providing additional nutrients.
Visual Appeal: When you dine gluten-free, beautiful presentation helps overcome any preconceptions about gluten-free desserts being inferior. Use colorful berries, mint sprigs, or edible flowers to create Instagram-worthy presentations.
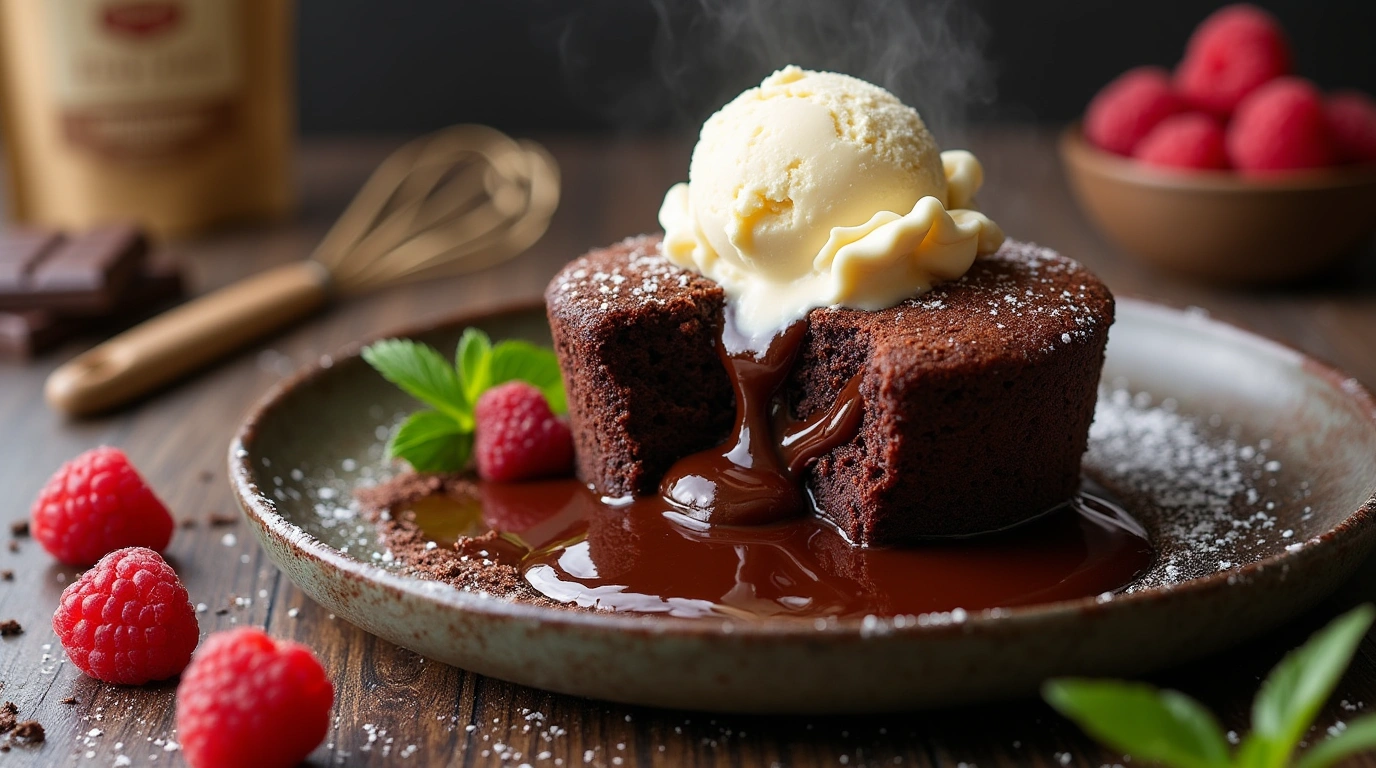
Complementary Accompaniments
Pair desserts with compatible beverages and sides. Fresh whipped cream (ensure it’s gluten-free) adds richness, while fruit compotes provide acidic balance. Consider gluten-free ice cream or yogurt-based accompaniments for temperature contrast.
Beverage Pairings: Coffee enhances chocolate desserts, while herbal teas complement fruit-based options. For special occasions, consider dessert wines or champagne that naturally complement gluten-free treats.
Seasonal Adaptations
Modify garnishes and accompaniments based on seasonal availability. Summer calls for fresh berries and light, citrusy additions. Fall and winter benefit from warm spices, candied nuts, and rich, comforting elements.
Seasonal Integration: When you dine gluten-free throughout the year, seasonal modifications keep desserts interesting and relevant. Use pumpkin puree in fall, citrus in winter, fresh herbs in spring, and berries in summer.
Common Mistakes to Avoid
Learning from common pitfalls accelerates your gluten-free baking success. When you dine gluten-free, avoiding these mistakes saves time, ingredients, and frustration.
Flour Blend Errors
Using single gluten-free flours instead of blends creates suboptimal textures. Rice flour alone produces gritty results, while almond flour creates dense, heavy desserts. Proper flour blending combines different properties for balanced results.
Solution Strategy: Always use tested flour blend ratios or purchase pre-made blends from reputable manufacturers. When you dine gluten-free, consistency comes from reliable flour combinations that have been properly balanced for optimal performance.
Overmixing Consequences
Gluten-free batters become tough and dense when overmixed. Unlike wheat-based recipes where some mixing develops gluten structure, gluten-free alternatives require gentle handling to maintain tenderness.
Prevention Technique: Mix just until ingredients combine, then stop immediately. Visual cues include no visible flour streaks, but the batter may appear slightly lumpy – this is normal and preferable to overmixed smoothness.
Inadequate Binding
Skipping xanthan gum or other binding agents results in crumbly, falling-apart desserts. These ingredients replace gluten’s structural properties and are essential for proper texture development.
Binding Solutions: When you dine gluten-free, never omit binding agents. If xanthan gum isn’t available, use guar gum (use 25% less) or ground flaxseed (use 50% more and increase liquids slightly).
Temperature Misjudgments
Gluten-free desserts often bake faster than traditional versions due to different moisture retention properties. Overbaking creates dry, crumbly textures that can’t be corrected.
Temperature Management: Check for doneness 5-10 minutes earlier than recipe suggestions. Use visual cues (golden edges, pulling away from pan sides) and toothpick tests rather than relying solely on timing.
Storing Tips for the Recipe
Proper storage maintains quality and extends enjoyment when you dine gluten-free. These techniques preserve texture, flavor, and freshness for maximum satisfaction.
Short-Term Storage Solutions
Room temperature storage works for 2-3 days when desserts are completely cooled and properly wrapped. Use airtight containers or plastic wrap to prevent moisture loss, which creates stale, dry textures more quickly in gluten-free desserts.
Container Selection: When you dine gluten-free, choose containers slightly larger than needed to prevent crushing delicate textures. Add parchment paper between layers for items that might stick together.
Refrigeration Guidelines
Most gluten-free desserts benefit from refrigeration after the first day, especially those containing dairy or eggs. Cold storage extends freshness up to one week while maintaining food safety standards.
Temperature Considerations: Remove refrigerated desserts 30 minutes before serving to restore optimal texture and flavor. Cold temperatures can make gluten-free desserts seem denser than they actually are.
Freezing Strategies
Freeze individual portions for convenient future enjoyment. Wrap pieces individually in plastic wrap, then place in freezer bags with dates. Most gluten-free desserts freeze successfully for up to three months.
Thawing Techniques: When you dine gluten-free, proper thawing maintains texture quality. Thaw frozen desserts in refrigerator overnight, then bring to room temperature before serving for best results.
Quality Preservation
Add moisture-preserving ingredients like honey or corn syrup to extend freshness. These hygroscopic ingredients attract and retain moisture, preventing the staleness that gluten-free baked goods can develop more quickly than traditional versions.
Freshness Indicators: Visual inspection reveals quality changes – look for surface cracking, color changes, or unusual textures. Trust your senses when evaluating stored gluten-free desserts.
Mind Map: Gluten-Free Dessert Success Framework
GLUTEN-FREE DESSERT MASTERY
├── FOUNDATION KNOWLEDGE
│   ├── Understanding Gluten-Free Principles
│   ├── Ingredient Science & Interactions
│   └── Equipment & Cross-Contamination Prevention
├── INGREDIENT MASTERY
│   ├── Flour Blends & Ratios
│   ├── Binding Agents (Xanthan, Guar Gum)
│   ├── Moisture Sources (Eggs, Fats, Liquids)
│   └── Flavor Enhancers & Add-ins
├── TECHNIQUE OPTIMIZATION
│   ├── Mixing Methods & Timing
│   ├── Temperature Control
│   ├── Baking Time Adjustments
│   └── Texture Development Strategies
├── RECIPE ADAPTATION
│   ├── Converting Traditional Recipes
│   ├── Healthier Substitutions
│   ├── Dietary Modifications (Vegan, Keto)
│   └── Seasonal Variations
├── PRESENTATION & SERVING
│   ├── Plating Techniques
│   ├── Garnish & Accompaniment Selection
│   ├── Temperature Serving Considerations
│   └── Portion Control & Nutritional Balance
└── STORAGE & PRESERVATION
    ├── Short-term Storage Methods
    ├── Long-term Freezing Strategies
    ├── Quality Maintenance Techniques
    └── Food Safety Considerations
Conclusion
Mastering gluten-free desserts transforms limitations into opportunities for culinary creativity and improved nutrition. When you dine gluten-free, you discover that alternative ingredients often provide superior flavors, better nutritional profiles, and more interesting textures than traditional wheat-based desserts. The key lies in understanding ingredient interactions, proper techniques, and patience during the learning process.
Call-to-Action: Ready to start your gluten-free dessert journey? Try this recipe today and share your results in our comment section below. Subscribe to our newsletter for weekly gluten-free baking tips, and don’t forget to check out our Pinterest board for more inspiration. Visit our Medium account for in-depth cooking tutorials and techniques. Your feedback helps us create better content – leave a review and let us know how your desserts turned out!
Equipment and Tools Comparison
| Traditional Baking Tools | Gluten-Free Specific Needs | Recommended Upgrades | Investment Priority |
|---|---|---|---|
| Standard Mixing Bowls | Dedicated gluten-free only | Glass or stainless steel set | High |
| Regular Measuring Cups | Precise measurement crucial | Digital scale (grams) | Very High |
| Basic Wire Whisk | Extra aeration needed | Balloon whisk or stand mixer | Medium |
| Standard Baking Pans | Non-stick performance important | Silicone or quality non-stick | Medium |
| Regular Cooling Racks | Adequate for most needs | Wire racks (multiple levels) | Low |
| Basic Timer | Precision timing critical | Digital timer with multiple alarms | High |
Troubleshooting Common Issues
| Problem | Likely Cause | Prevention Strategy | Quick Fix |
|---|---|---|---|
| Crumbly, Falling Apart | Insufficient binding agents | Use proper xanthan gum ratios | Add egg or applesauce to bind |
| Dense, Heavy Texture | Overmixing or wrong flour ratio | Gentle mixing, proper measurements | Can’t fix – prevent next time |
| Dry, Tough Results | Overbaking or insufficient moisture | Check doneness early, add fats | Serve with sauce or frosting |
| Gritty Texture | Poor flour blend or undermixing | Use fine flour blends, mix thoroughly | Sift dry ingredients twice |
| Sunken Centers | Temperature too high or underbaking | Proper oven temperature, test doneness | Individual portions work better |
| Spread Too Much | Batter too thin or warm | Chill dough, adjust liquid ratios | Chill before baking next batch |
FAQs
Q: Can I substitute regular flour with gluten-free flour in any recipe? A: Not directly. When you dine gluten-free, recipes require specific adjustments for binding, moisture, and leavening. Start with recipes specifically developed for gluten-free baking, then gradually learn conversion techniques. Simple 1:1 substitutions rarely produce optimal results without additional modifications.
Q: Why do my gluten-free desserts seem more expensive to make? A: Gluten-free ingredients typically cost 2-3 times more than conventional alternatives. However, when you dine gluten-free, consider the health benefits and improved nutrition profiles. Buy ingredients in bulk, join co-ops, or make your own flour blends to reduce costs significantly.
Q: How can I tell if my gluten-free dessert is properly baked? A: Use multiple indicators: golden edges, pulling away from pan sides, spring-back when lightly touched, and toothpick tests. When you dine gluten-free, visual and tactile cues become more important than timing since baking speeds vary with different flour combinations.
Q: Can I make gluten-free desserts ahead of time? A: Absolutely! Many gluten-free desserts actually improve after resting, allowing flavors to meld and textures to stabilize. When you dine gluten-free, make-ahead options include freezing baked goods, preparing components separately, or making no-bake alternatives that hold well.
Q: What’s the shelf life of homemade gluten-free desserts? A: Generally shorter than wheat-based versions due to different moisture retention. Most last 2-3 days at room temperature, 5-7 days refrigerated, and up to 3 months frozen. When you dine gluten-free, proper storage becomes crucial for maintaining quality and preventing staleness.
Q: Are gluten-free desserts automatically healthier? A: Not necessarily. When you dine gluten-free, you remove gluten but may add more sugar, fats, or processed ingredients to compensate. However, using whole grain gluten-free flours, natural sweeteners, and nutrient-dense add-ins can create healthier options than traditional desserts.
Q: Can children help make gluten-free desserts safely? A: Yes, with proper precautions. When families dine gluten-free, involving children teaches important dietary management skills. Ensure thorough hand washing, use dedicated utensils, and supervise cross-contamination prevention. Many gluten-free recipes are actually easier for children since they require gentler mixing techniques.
Q: What should I do if my gluten-free dessert recipe fails? A: Analyze what went wrong before trying again. Common issues include incorrect measurements, overmixing, or oven temperature problems. When you dine gluten-free, keep detailed notes about modifications and results. Join online communities for troubleshooting support and recipe sharing.
This comprehensive guide provides everything needed to succeed when you dine gluten-free. From basic techniques to advanced troubleshooting, these strategies ensure delicious, satisfying desserts that everyone can enjoy. Remember to check out our related articles on gluten-free bread crumbs and gluten-free Oreos for more gluten-free inspiration.